BSA – Editors

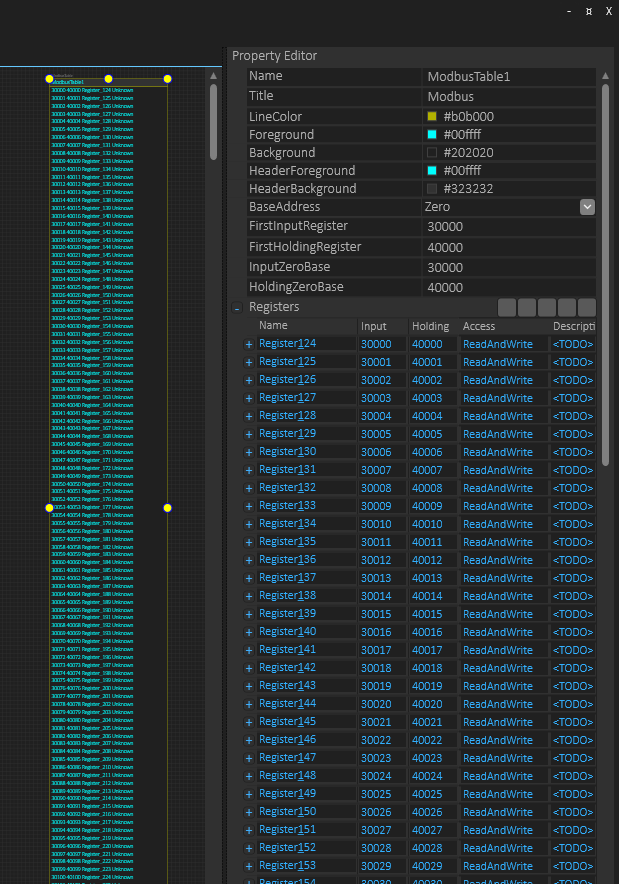
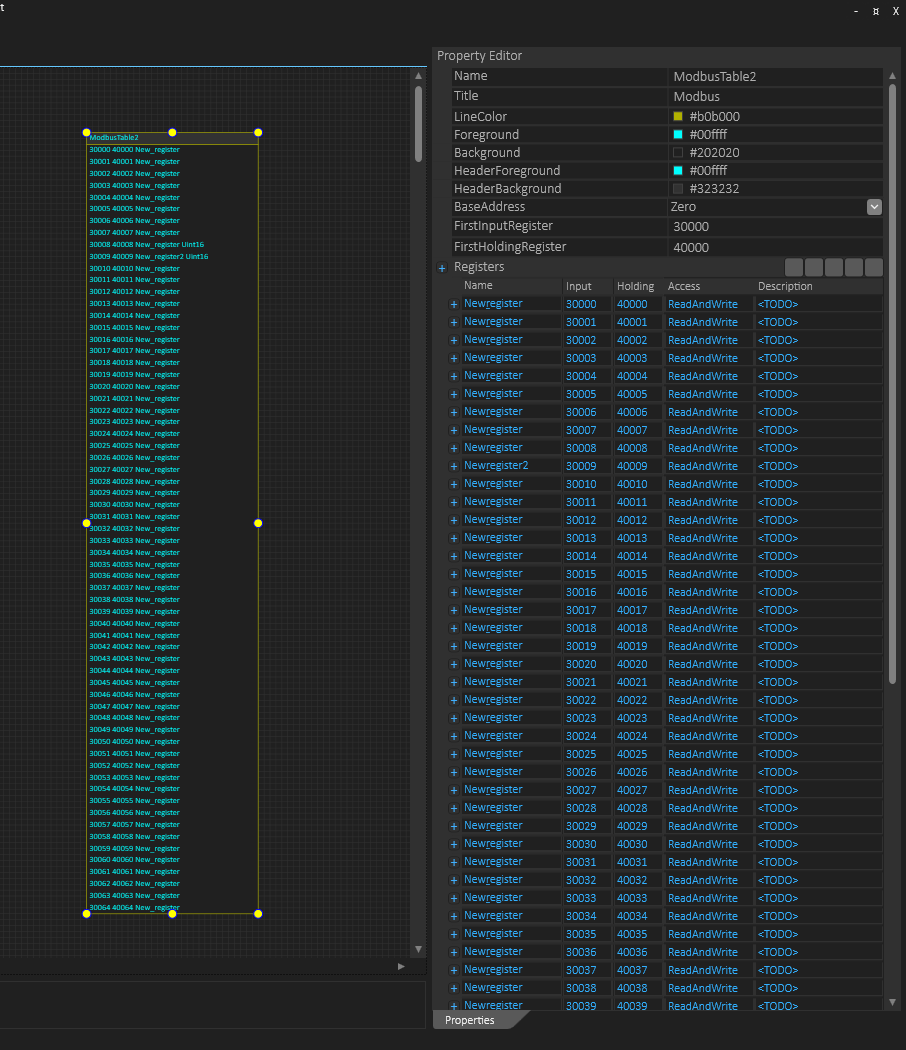
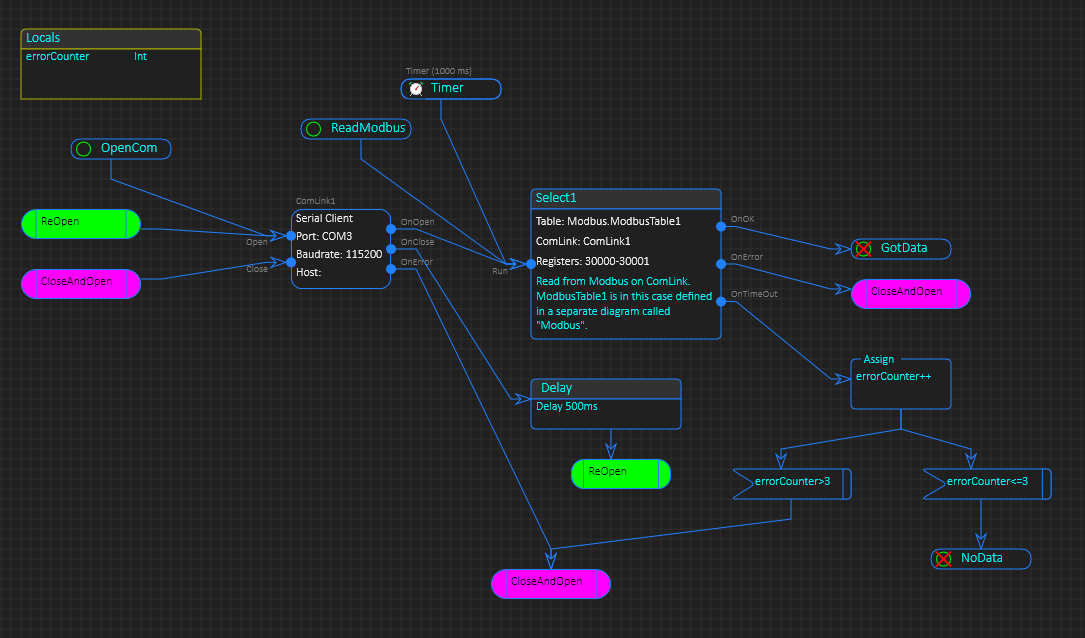
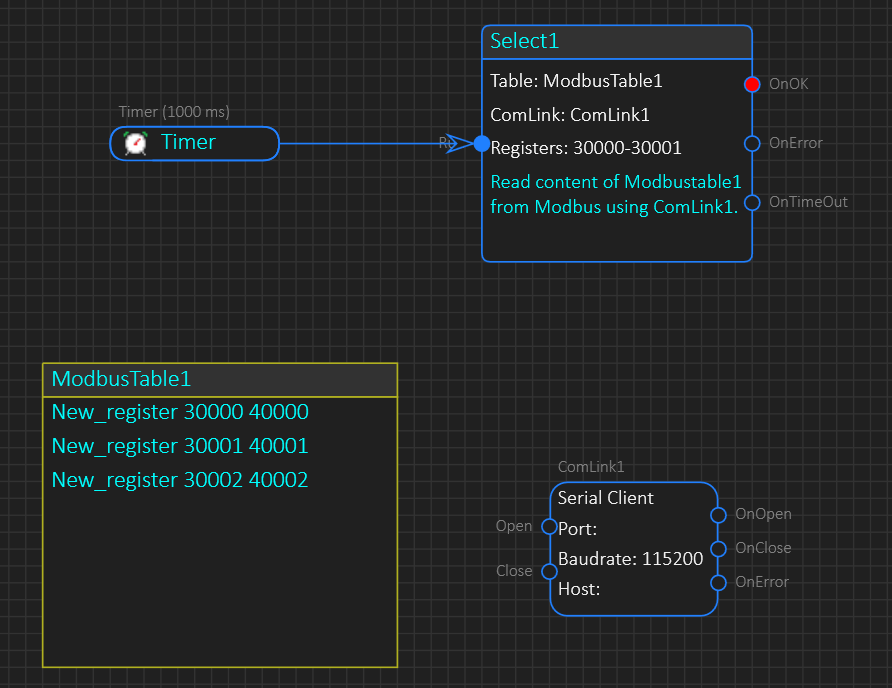
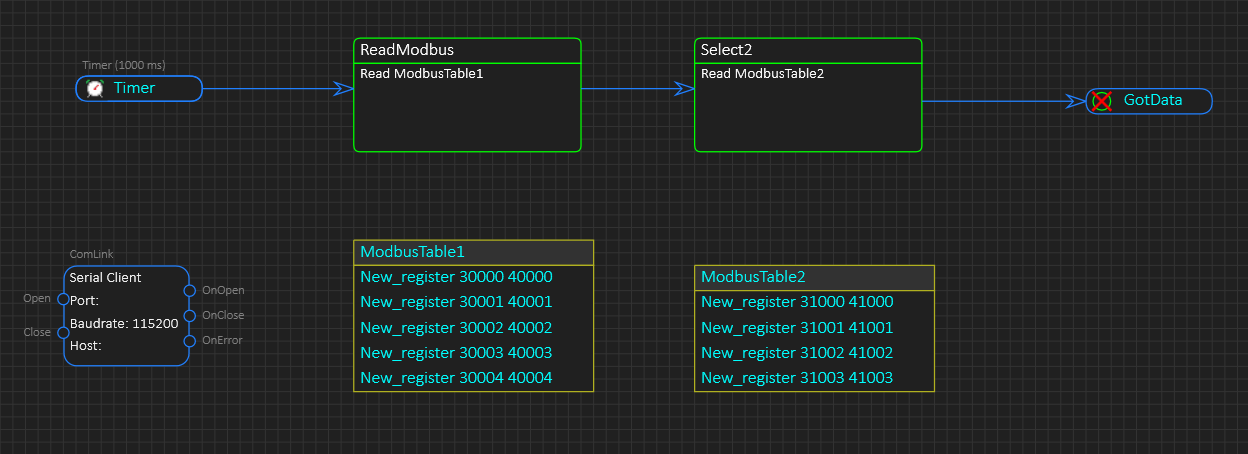
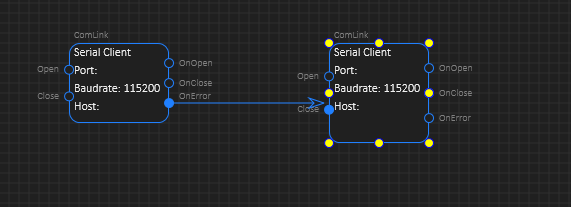
This shows BSA Table editors in use -I need to use them a little myself to verify if they are ok – I admit it is a bit confusing to have description in the table and then have to edit it as a property. But, the mini tekst editor is actually great. DataType is only a tekst string – you can write anything you want – same with name. I don’t think I want any automation restricting you here, but I will need a BSA Compiler that check rules – etc if names are unique and if DataType is known.

This leads me to a more complex editor – the one I need for assign statements, Parameters, Relations etc – I have decided to start with an easy concept of an editor where you write small snippets of logic with the dame concept – you write whatever you want and the compiler verifies the content. I can always consider more automated concepts later, but I think it would be an error to rule out text editors.

BSA – Table Events

Tables are objects with their own methods and events, so the example below grab events from tables and process them. This is the same as adding a start label with the event name as the PLDFlow link will need to be connected to an Event and a Method and convert data between them. Event comes with parameters and so does Methods, so the PLDFlow will need to take the input event parameters and create the method parameters.

I could have done this in my previous example as well – taking the PLDFlow directly from the OK button, but this is your choice – sometimes it is convenient to use start labels. PLDFlow will allow you to select available events in the scope – if you drag from a Start symbol the selection is whatever is selected in the start symbol. If you drag from a component the selection is the exit events of that component. Notice that the line with Arrows are PLDFlow while the lines with “forks” are Data Relations. I will change colors to make it more obvious that they are different. Table is one of the few objects that can use both Data Relation and PLD Flow.

SQL Databases also support Triggers (same as events) and Stored Procedures etc. BSA will support these at some point allowing import and definition of those. But, this is not primarely a data modelling tool, so it’s a bit down on the list.

This creates a question – with table supporting events and methods as any other object – do I actually need the specialized Select, Fetch, Update and Delete?

This diagram have no input flow to Table – which is ok because Methods and Events are either Mandatory, Optional or Static. An Object with no Mandatory Methods do not need an input PLDFlow – that said it could benefit from a Timer connected to Select in this case.

Mandatory Methods/Events are those who MUST be used. The BSA Compiler will issue an error if these are missing. Optional means you can chose wherever to implement them or not, meaning they must have a default implementation. Static Events cannot be overrided by user – in this case you have decided that the event shall call a specific method. Only events can be Static.

As for Select, Fetch, Update and Delete – these also have a filter part, so yes I do need them.

BSA – Data Flow

BSA contains two techniques to model data. One is classic ER Diagrams and the second UML Class Diagrams. Class diagrams provide an object oriented approach that will go well with languages like C++, C# and Java, but a class is basically only a definition of a new datatype that you can declare as a variable using ER Diagrams. Tables in ER Diagrams represent actual, physical data structures with variables. This is how BSA will need to use the two techniques and the current scope focus on ER Diagrams. It might be incorrect of me to use terms like “ER Diagrams” and “UML Class Diagrams” because at the end of the day I tailor the modelling techniques to what I need them to be to support an executable specification.

Each diagram name must be unique and as you draw a table on a diagram the diagram name + table name form an unique, global name that can be accessed from anywhere.

This example show a simple Customer Table, an associated form to edit it’s content and the logic of what happens if you press the OK button. Both Tables, Forms and the components you add have multiple events you can activate with the PLD Start symbol, but I only show one event processed here for the purpose of illustrating BSA at use.

To be formal I should probably call the event “Form_Customer.Button_OK.LeftMouseUP” or something, but I want to look into default naming to simplify diagrams, so if I use the name “OK” on the button and as no other object on the diagram uses that name – “OK” should be ok – local name scope. I need to work a bit on the details here, but I am reaching a point where I can generate code. And once I start generating code I will probably also need to adjust BSA to cover details I have not seen yet.

Another observation is that the forms and logic shown above can be auto-generated from the Table definition – simply adding a Wizard that provide a default diagram you can change afterwards. This capability is worth gold if you do heavy database modeling and want to quickly test your model. Keep in mind that the “Table” here can be anything from a real SQL Table, to a XML file, RAM table etc.

The one thing I am a little unsure about is binding of events from the Table to the Form – I think I will like to avoid creating a “source” in the edit fields and force “Fetch” to convert data in the current entry to fields on the screen (or other data entries) – this way I leave the user full manual control and avoid auto-magic that don’t always work. The complete diagram can be see below.

I think this will work out just fine – and sorry for the dotted flow lines – that is a bug 🙁

One complicating factor here is that Select, fetch and Update hide the executable details – you will have to click on each bog to see actual code in form of properties. This means that while it is easy to follow logic it is more difficult to see actual code and find bugs – so I need to work on that a bit as I address the debugger later.

BSA is coming together, but it is a complex tool and lot of things that needs to work properly. I am currently focusing on classic database modelling, Forms and Modbus in the first release that probably only will target C#. It is more or less exactly 1 year since I started on this task with WPF so progress have been good, but it is still a lot of work to be done.

BSA – Styling Native Controls

It is two controls with an identical border on the picture above. The button display the border correctly, while the ComboBox do not display the border at all. It does have a BorderBrush that I set, but it has no effect. This is quite common with build in native controls – it might be a trick to this – I don’t know. This is sadly a repeatetive challenge for styling Windows GUI, so what I will do is to create my own ComboBox that I can control 100% – I simply need controls I can trust because I will re-use them in the SDK. So, it is often less effort to simply create a new one than fighting Windows GUI limitations.

In this case I want to control colors for Normal, Hover and Selected on Background, Foreground, Border as well as all details on the drop down part as well. I need full control and so do you. In old Windows you could use the control and take over painting – I am a bit on thin ice on that on WPF, so lets see. If I can control the ComboBox I will use it as is, but it is more than just controlling as we would like to add images and details on the selection list etc.

Or a workaround can be to just overlay a transparent rectangle with rounded corners like above to get around this specific issue. What you see is the Hovering effect of my ButtonStyle=Border Button. I code that into all controls so you can visualize selection or hovering with a thick border – a “Standard” control will change background. These effects are handy in creating a modern, custom styled HMI.

BSA – Code Generator Results

And this is the result of the code generator. In C++ and C# you can use inheritance – simply use a base class for symbols, autogenerate a HMIButton_base and then create the final HMIButton manually – this is a nice way to allow autogenerated code while you still have the full manual control. C# have an even nicer technique that I used – partial class. I autogenerate a class with all property setting based on a Excel spreadsheet and manually write the part creating the symbols.

Obviously I still have a few bugs:( – … but my code generator works just fine. This will make a significant impact since we talk about hundreds of components with 10 to 30ich properties each and each property account for ca 10 lines of code 🙂

BSA – Assisting Code Generator in place

This example is the property list for Button. This is just an early draft, but as I added more properties to Button yesteday I realized that this would take some time with the number of components involved as every property require a bi of coding. So using a CSV file allow me to use Excel as editor and then just run a simple script in C# to generate repetive code that I can use to cut and paste from. It actually worked out well, it took me yesterday to moch up the code generator and today I can start speeding up adding properties – or more correctly modving my focus away from declaring properties to implementing their usage.

This is not rocket sciense as I believe every single developer have done something similar at one point using CSV, XML or JSON.

BSA – Generating Code

I am sitting setting up all the properties for the components and it is a bit of work for each component, so what I want to do is one of my usual tricks to code using Excel. Simply by creating a CSV list, read it into a C# app and generate all the property settings and code because it’s a lot of repetition and there will be changes. To do so I will need to create a tree structure in Excel – it is many ways of doing this, but I want a table that is simple to edit and a small app that convert that into C# code so I have an easy way of editing properties – and can save some hours.

While this is used to set up the list for BSA it will also become part of BSA as we allow users to create their own components.

  • 001, Component Name
  • 002, Property Name,…..
  • 003, Value,…..

I think a simple tree where 001 is top, 002 subtree to last 001 aso will do the job – comma separated text fiels so they are easy to edit in Excel or similar.

This is a task you need to consider, but the general idea is that if you need to set up loads of repetive lines like I do now it might be worth consider spending the time on the code generatir instead. Many of my friends use Python for this, bur for me it is faster to do this in C++ or C#.

BSA – Property Editor Compromise

Now as I know why I have a performance issue and know the solution it is also possible to make a compromize. I need to address performance, but I can live with what I have for a while. The issue is that it is easier to experiment with functionality using XAML, so I can make it functional before optimizing performance – you need around 50+ properties before you notice the performance issue anyway.

The reason I can make this compromize is because the real property list is an internal list that do not care about the property editor, so all I need to do is to make the new, optimized with an identical interface later and voila… lets move on…

BSA – New Property Editor

This picture is the old one that had performance problems. The new one is not so impressive yet, but it’s performance is far better. I ended up doing the exact same from code as I did from XAML finding out that it was far faster and allowed me to do some smarter code. At the end of the day WPF (or should I say GPU) are capable of handling large tables, but you need to be aware that IO between CPU and GPU can be a bottleneck. So at 1000 entries it still started to get unacceptable slow. The solution is obvious – since I now coded the grid I could also focus on the visual parts only and update the grid as I scroll – basically creating a virtual grid to be able to handle large amounts of data.

The problem started as I added several properties to the grid and noticed that it became slow, so I added 1000 and was shocked about XAML performance. I am not confident that coding it in C# will be better then all details are added, but I can add smarter code. I only update those that are visual and text strings (as an example) I only display and create the editor as I need them – I also only create a single editor because I can only edit one field at the time anyway – the later is important for solving the huge memory leakage I detected.

The drawback is all the extra work I am forced to do, but this is engineering for you – sometimes you need to redo things because of unexpected challenges.


Looking at the examples above I also need to consider the end result – the embedded mini word processor is great, but it makes the property list long. The same with the attribute table expanded – and as each attribute have it’s own description with mini editor this really takes over the property list. The result all in all is very functional, but this is a very important part of the tool so we need to be critical and look for improvement options. One details is how I collapse a description – another is to avoid expanding multiple attributes unless I want to – I could also move tables and descriptions to separate pages – this is the upside og not using XAML as I can easier do more smart systems.

Home Autiomation – LoRa based Bootloader

One of the things I am looking into is to have a bootloader through LoRa. Making one is straight forward, but I actually think I can use the build.in silicon bootloader as is…

You probably know that all STM32 MCU’s comes with a build-in bootloader in ROM located at a special address. You invoke this by using boot pin, but less known is that you actually can call this manually from firmware. in my case I have LoRa connected to USART, and accessing this from a PC I should be able to use the build-in bootloader over LoRa and use ST’s own utilities.

The trick here is that neither the serial line on MCU or PC actually see the LoRa in the middle. The LoRa unit I use can be configured once and will afterwards just work using that setting. I obviously need to create an adapter for my PC as well (or buy one), but that should be doable.